


How to Start Your First Oil Painting with Charvin
Starting with oil paint can feel like a big step. It is a slower, more tactile medium than acrylic or watercolour, which is part of what makes it so appealing. It gives you time to blend, adjust, and build depth in a way that feels deliberate from the first brushstroke.
That is also why the quality of your materials matters. If you are beginning with Charvin paints, you are starting with a brand known for rich colour, smooth handling, and a long-standing reputation for quality. For art students and hobbyists alike, this can make the learning process feel more controlled and far more rewarding.
If you are ready to begin, this Charvin paint guide will walk you through the essentials for your first oil painting, from the materials you need to the best way to get started.
Why Charvin Paints Are a Strong Choice for Oil Painting

For a beginner oil painting experience, the quality of your pigments matters more than you might think. Many entry-level paints use fillers that make the colours appear muddy or unclear when mixed. Charvin paints are different. Because they use a high concentration of triple-milled pigments, the colours stay vibrant and true, even when you are just learning how to blend.
One of the most unique aspects of Charvin paints is their use of poppyseed oil as a binder. Many brands utilise linseed oil, which can yellow slightly over time, but poppyseed oil helps those colours to stay true. It also makes the paints feel wonderfully buttery on the canvas.
As a beginner in oil painting, that buttery feeling is a gift. The more easily you can move your paints about your canvas, the more time you have to blend and manipulate your strokes before it begins to cure.
A Charvin Paint Guide for Beginner Oil Painting: Step-by-Step
1. Get all your materials together.
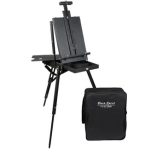
You don’t need a full studio setup to begin, but choosing the right materials will make the process far more manageable from the start. To begin with, focus on a small number of reliable tools that support how oil paint behaves.
· Your palette. A glass or stay-wet palette provides a smooth surface and keeps your paint workable for longer, which is useful when learning to mix and blend.
· Brushes. Oil paint requires firmer brushes to move the heavier consistency. Hog bristle brushes are a strong starting point, with a few synthetic brushes added for finer detail work.
· Your canvas. Use a gesso-primed canvas or canvas board. This prevents the oil from soaking into the surface and ensures the paint sits properly for layering and blending.
· Solvents and mediums. You will need two jars. One for a low-odour solvent to clean brushes, and another for your painting medium, typically a mix of oil and solvent, used to adjust paint consistency when needed.
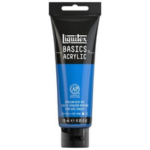
· Charvin paints. Starting with a considered colour selection or a curated set can make a noticeable difference. It gives you a balanced palette to work from and helps you understand how colours mix without unnecessary guesswork.
Once your materials are set up in a dedicated workspace, you are ready to begin.
2. Underpaint.
Start by applying a thin wash of a neutral colour, such as Burnt Sienna, diluted with solvent. This removes the stark white of the canvas and creates a base tone that helps with colour balance and layering as you build your painting.
3. Block in.
Using your Charvin paints, begin laying in the mid-tones. Focus on placing the main areas of colour rather than detail at this stage. Because of the strong pigment in Charvin paints, you only need a small amount on your brush to achieve solid coverage, which helps keep your mixes clean and controlled.
4. Build the light.
Once your mid-tones are established, start developing shadows and highlights. Work gradually, building contrast and form across the canvas. The slower drying time of oil paint allows you to blend directly on the surface, giving you more flexibility to soften transitions and refine tonal changes as you go.
5. Final touches.
With the main structure in place, switch to a smaller brush to refine details. Focus on edges, highlights, and areas that need definition to bring the painting together.
6. Clean-up and brush care.
Do not leave oil paint on your brushes to dry. At the end of each session, clean them in solvent, wipe off excess paint, and wash with a dedicated brush soap and warm water.
Reshape the bristles and allow them to dry flat. Taking care of your brushes will ensure they remain consistent and reliable over time.
Starting oil painting with a clear process and reliable materials makes a noticeable difference. Charvin paints are designed to be consistent and easy to work with, which helps you focus on technique rather than adjusting to the medium.
With a small, well-chosen setup and a structured approach, you can build confidence quickly and start producing work that feels more controlled from the beginning.
Beginner oil painting made luxurious with Charvin paints.
At Ribbon Rose, you will find a carefully selected range of oil paints, brushes, and materials suited to both students and experienced artists. Every product is chosen for its performance, so you can focus on developing your technique without second-guessing your tools.
Browse our oil painting range to get started with Charvin paints and build a setup that works from your first canvas.